Manual
To make sure your phone doesn’t use any expensive data on your trip, go to Settings, then General, tap on Network, and slide the Data Roaming to “off”.

To start up the application, find the icon for the right map on your iPhone:

Enjoy the opening screen for a second or two while the application loads:

When the application has loaded, it’ll show you the map for the city:

You can use the same gestures you are familiar with from Google Maps: pinch to zoom, double tap to zoom, slide to move around on the map, and so on. You’ll find the actions very intuitive.
The “Find me” button attempts to locate you on the map.

The small button on the bottom right of the screen will bring you to the options:

The options are:
Find location (not available in “Lite” versions of maps)
This will show you a list of all street names known on the map. Usually there are quite a lot of them, and it may take a second to load the full list. You can search for a street name, all you need to know is any part of the name – just type the part you know, and the list will be trimmed to include only those names you are looking for.

Tap on the name you want, and you’ll get a marker on the map, so you know where to go:

Note that is the location you want to find isn’t nearby the place on the map you were looking at, you won’t immediately see the marker. If the location you want isn’t visible right away, you’ll have to zoom out a bit to find it.
Find amenity (not available in “Lite” versions of maps)
There are many categories of amenities you can find. Tap the one you want:

For some amenities, only a few will have a name. For example, if you’re looking for a nearby ATM to get some cash, it is unlikely that it will have a name, and even if it has, it is unlikely you know the name. So for all amenities, there’s always a “Show all” button:

This way, it’s actually easy to find a nearby ATM (or parking, or fuel station, etc). Just tap on the “Show all” button to fill your map with lot of markers, next tap the “Find me” button, and you can find the nearest one easily!

Remember location (not available in “Lite” versions of maps)
Stores the most recent “Find me!” location for later retrieval. You’re asked to give the location a name, so pick a name that’s useful for you. For example, if you parked at a large parking, you may want to enter the level in the name, for example “Schiphol Parking level 4 aisle 5”. That way, the GPS can guide you back to the right parking, and the name to the right spot within the parking.

Return to location (not available in “Lite” versions of maps)
This will place a marker on the map for a location you previously stored, to help you guide back to the same place:

When you don’t need a location any more, you can delete it, just tap the delete button:

About

In the left column you’ll find a list of all the cities we currently have a map for. Find the city you live in, and click the “download” link on that page to get the map!
If you’re in a city we don’t currently, list, don’t worry! Contact us and we’ll create the map for you!
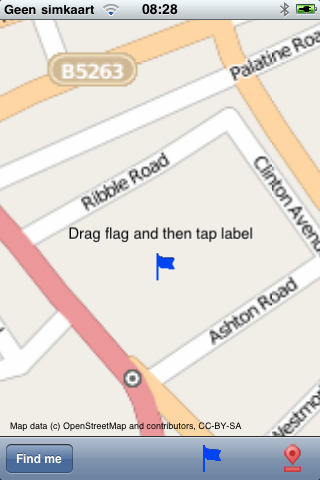
In maps with version 1.2 or later, you can prepare locations you want to visit before you leave for your trip. Just tap on the blue flag at the bottom of the map, and you’ll get a fresh new flag on your map, with the label “Drag flag and then tap label” above it:

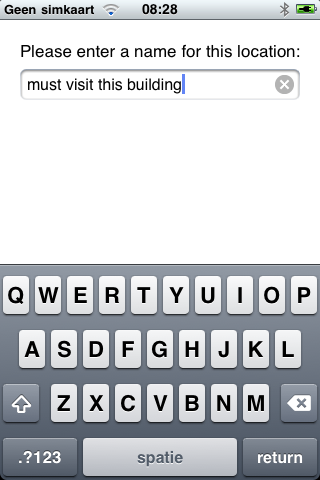
You can drag the flag around and position it to precisely the location you want to remember and revisit during your trip. Once it’s positioned correctly, tap your finger on the label text, and you’ll be prompted to give the location a name:

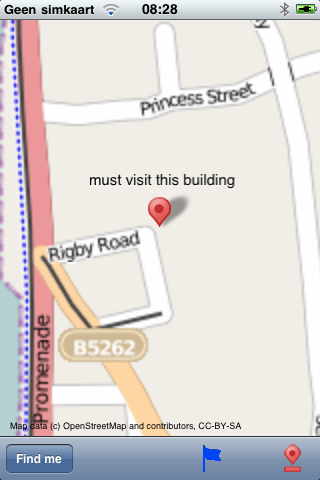
And after that you’ll always find it in your “Return to location…” list:


